You'll need this:
-
One of these Pointerpro plans:
![]() Professional
Professional ![]() Enterprise
Enterprise ![]() ReportR
ReportR ![]() DistributR
DistributR
GIMP is an open-source tool completely free to use and has many features Photoshop has to offer as well.
On this help guide page:
1. GIMP
-
Setting GIMP Up
-
Making the background transparent
-
Exporting your logo
1. Setting GIMP Up
Alright, so you installed GIMP and fired it up, it will probably look similar to this.

To open GIMP in one window, you go to Windows --> Single-Window Mode
2. Making the background transparent
Now open the image you want to make transparent. I’ve chosen this image:
But you can use whatever image you like. To open an image go to File --> Open and then select your file. Alternatively, you can press CTRL+O.

What differs GIMP and Photoshop from Paint and similar programs is that they use layers. Each layer can be edited individually, so you can edit parts of your image without having to touch the other one.
These layers can be found in the upper right corner of your screen. To add transparency right-click the layer and select 'Add Alpha Channel'.
To make the background transparent we will use the Select By Color Tool. You can use it by pressing Shift + O or going to Tools --> Selection Tools --> By Color Select.
Press anywhere around the logo on the white space you want to erase. A moving dotted line should appear around it. Press delete and a checker-like background should appear, like so:
If this isn’t the case make sure you added an alpha channel to your image, and there aren’t any other layers left. If you have a ‘Background’ layer you can delete this by right-clicking it and selecting ‘Delete Layer’.
Congratulations! You’ve made your first logo with a transparent background!
3. Exporting your logo
You can’t simply ‘Save’ your image or ‘Save As’. You will save your image in .xcf format, this way it’s only suitable for an image editor. To use it on your site you have to export your image. To do this go to File --> Export As or press Shift + Ctrl + E.
You can also choose to overwrite your file, but then the original image will be lost. A menu asking you where your file should be stored will pop up. You can also change the name of your image, make sure you add .png at the end. Formats like .jpg do not support transparency while .png does.
Now press ‘Export’ and you are done!
2. Photoshop
In this tutorial Photoshop CS6 is being used. The performance will stay the same whether you use an older or newer version, menus may simply look a little different.
2.1.2. Selecting Magic Wand Tool
Method 2: Polygonal Lasso Tool
Method 1: Magic Wand Tool
2.1.1. Open the image
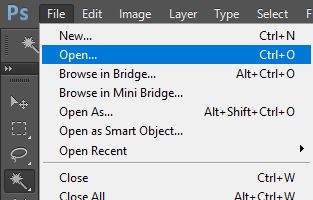
You do this by going to File --> Open or you can press the shortcut Ctrl + O.
2.1.2. Selecting Magic Wand Tool
You can see the icon to the right of your screen in the vertical Tools Panel. Right-click the 4th icon and select the Magic Wand Tool. You can also press W as a shortcut.

2.1.3. Removing Background
Press anywhere in the background space you want to delete. A dotted line will appear indicating the area you are about to delete. If the area isn’t big enough, you can always add more to your selection by holding down Shift + clicking the area you want to add.
If you miss clicked you can remove your entire selection by right-clicking and picking Deselect.
A checker-like background should appear on your image.
2.1.4. Saving your Image
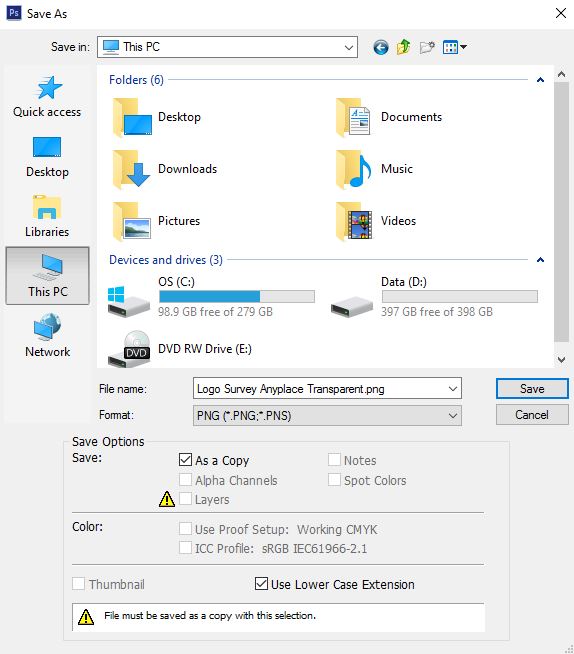
Now it’s time to save your image. Go to File --> Save as. Not all image types display transparency. Make sure your image is saved as a PNG file.
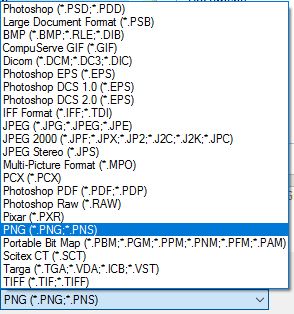
Select the PNG option:

You now have a transparent logo. But, there’s a second way to do this:
Method 2: Polygonal Lasso Tool
If your background is a little too cluttered the Magic Wand tool will not always be sufficient. In this case, we will use the Polygonal Lasso Tool.
2.2.1. Open the image
You do this by going to File --> Open or you can press the shortcut Ctrl + O.

2.2.2. Polygonal Lasso Tool
You can see the icon to the right of your screen in the vertical Tools Panel. Right-click the 3rd icon and select the Polygonal Lasso Tool. If you already selected it simply press L as a shortcut.

2.2.3. Removing background
You can now draw a path around what you want to delete from your image. To select more accurately you can always press Ctrl and ‘+’to zoom. To complete your selection press Ctrl + click on the final piece of your created path. Press Delete to remove the element, a checker-like background should appear at the place of the object.
2.2.4. Saving your image
Go to File --> Save as. Make sure your image is saved as a PNG-file. Other image types do not always support transparency.
Select the PNG option:
Now press ‘Save’.
What's next?
- Learn how to Create an Animated Background in Photoshop. A GIF can be a handy tool to get people interested in a picture. If you get very creative, moving images can capture the viewer’s attention very quickly. So it’s worth the time and effort to experiment with animated images to enhance the pictures on your website and social media platforms.
- Edit Design Settings to customise your survey's design to match your company colors and identity. There are loads of different features for you to play around with. Each one works independently, so choose as many or as few as you fancy to customize your design!
-
Create a survey to collect data from a group of respondents in order to obtain knowledge on different topics of interest. Here’s a guide to quickly create your first great-looking survey.