
The Build editor is where your assessment comes together. From one screen you can edit your intro screen, question groups, questions, scoring, advice, and skip logic — by hand or with the AI chat — then lock your assessment and put it live. This guide takes you through every part of the Build editor, from opening an assessment to publishing it.
You'll need this:
-
One of these Pointerpro plans: Any plan, including a free account
-
These additional assets: An assessment you've already created - see How to create your first assessment
On this help guide page:
- Open the Build editor
- Switch between node view, list view, and fit to view
- Edit the intro screen
- Edit a question group
- Edit an individual question
- Review your skip logic
- Edit your assessment using the AI chat
- Edit the final screen
- Test your scoring with the ghost respondent
- Lock and publish your assessment
1. Open the Build editor
Go to your overview of questionnaires and select the assessment you want to review or edit. You land directly in the Build editor. The node view — a flow chart of your assessment — fills the canvas, and the AI chat sits next to it on the left.
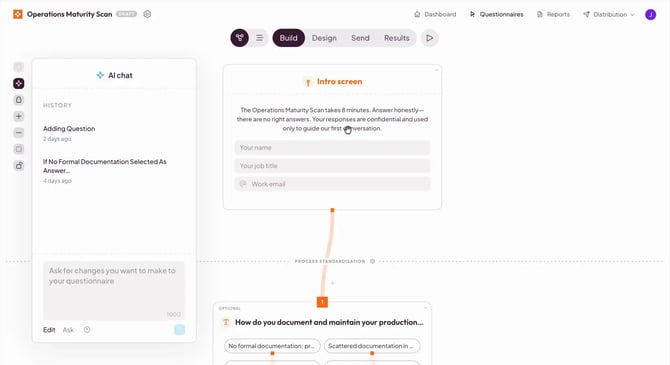 The Build editor: the flow chart of your assessment, with the AI chat on the left.
2. Switch between node view, list view, and fit to view
At the top of the screen, choose between the node view (flow chart) and the list view. The list view is the questionnaire builder you may already know, with the same editing options as before and your questions shown as a list.
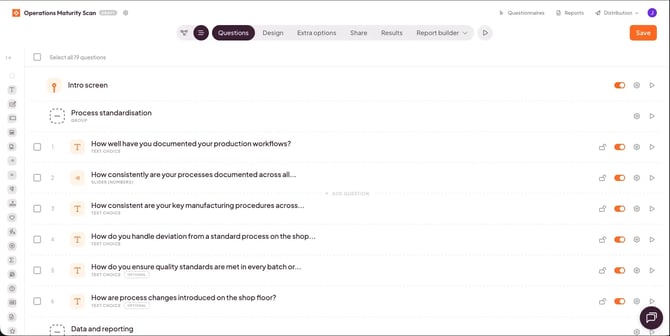 The list view, showing your questions as a list.
Back in the node view, use the toolbar on the left of the canvas to zoom. Fit to view shows your whole assessment at once, which is handy for a long one, and the zoom in button takes you back to the detail.
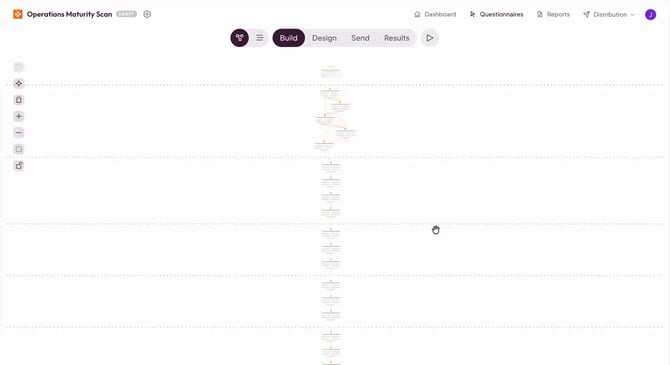 Fit to view shows your entire assessment on one screen.
3. Edit the intro screen
The intro screen sits at the top of the canvas. Open its edit screen to change the intro text and the label of the start button under Content.
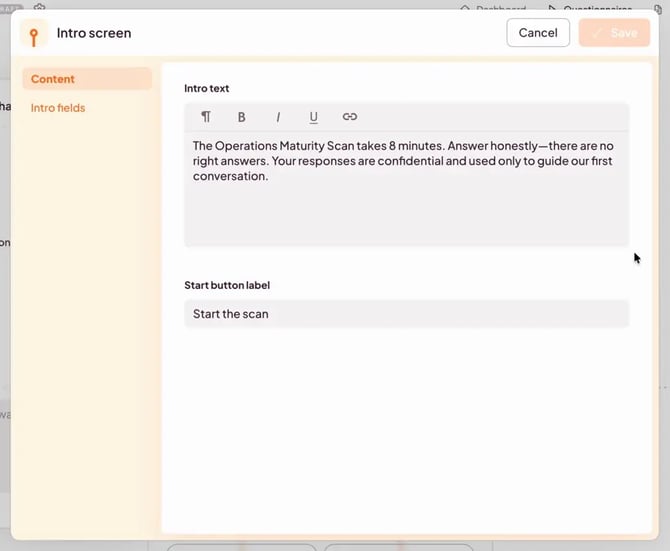 Editing the intro text and start button label.
Under Intro fields, add or delete the fields respondents fill in before they start.
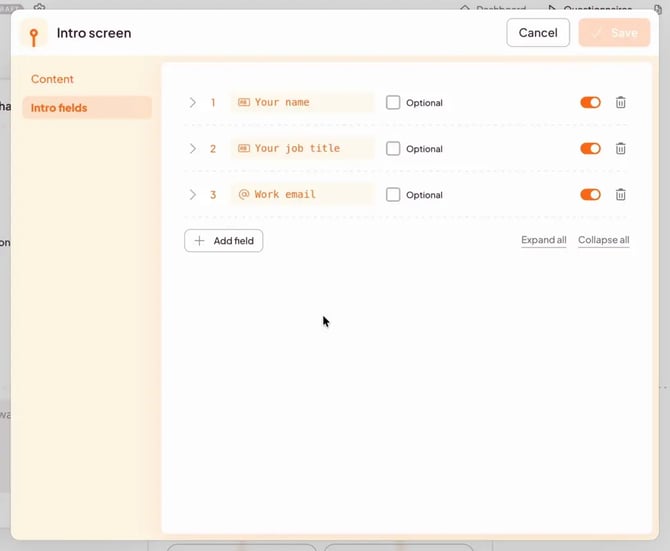 Adding and deleting intro fields.
4. Edit a question group
Questions are organized into question groups, such as the Process standardisation group in this example. Open the edit screen of a group to set options for that group only. You can change the group name under Info.
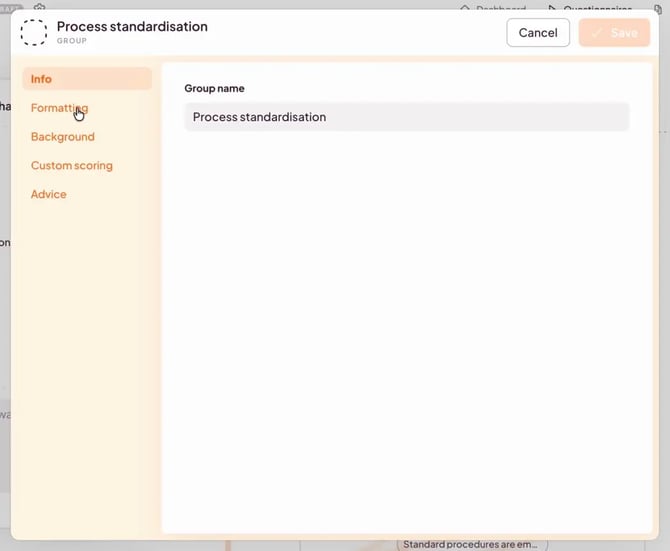 The settings of a question group.
Under Formatting, show questions on the same screen, randomize questions, or create a question pool. Under Background, change the background of the group to a color or add an image.
Under Custom scoring, change the maximum score and the score weights for the group.
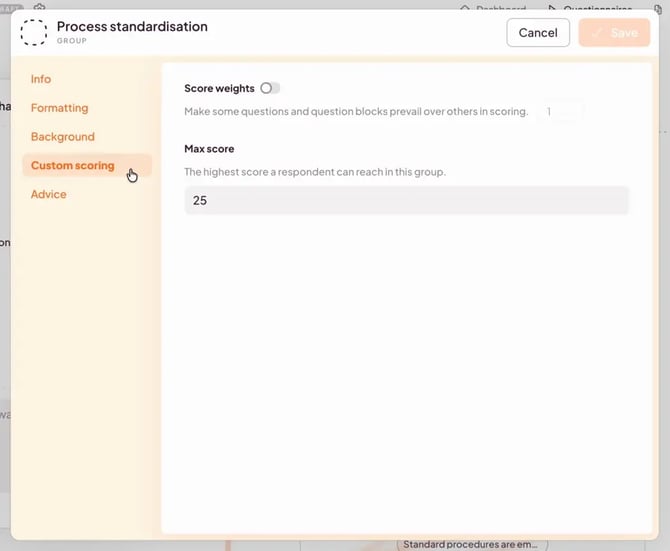 The maximum score and score weights of a group.
Under Advice, write the advice respondents get on their individual dashboard, and set the score range it applies to. Add more advice for other ranges if you want to give different advice depending on the score.
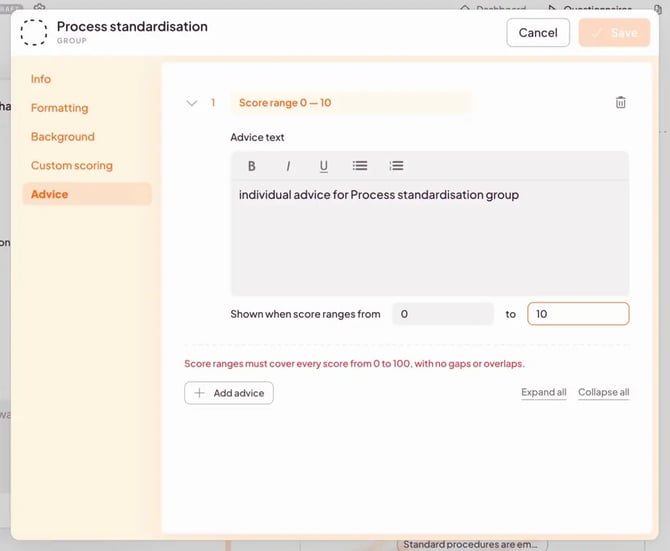 Writing advice for a score range.
NOTE
Score ranges for advice must cover every score from 0 to 100, with no gaps or overlaps.
5. Edit an individual question
Each question card shows whether the question is optional (question 1 here carries the optional tag, question 2 doesn't, so it's mandatory), the question type, and the answers.
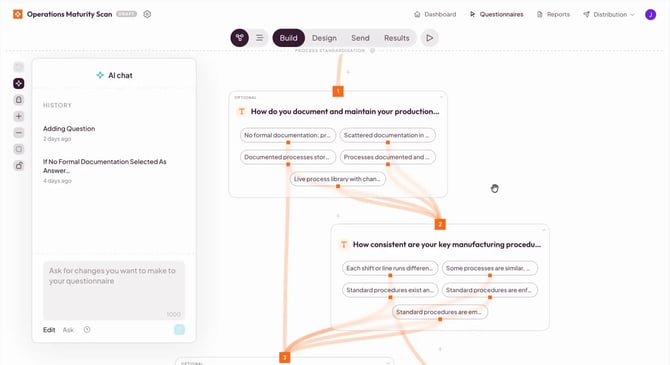 Question cards, with their optional tag, question type, and answers.
Open the edit screen of a question to change it. Under Content, edit the question text with the text editor.
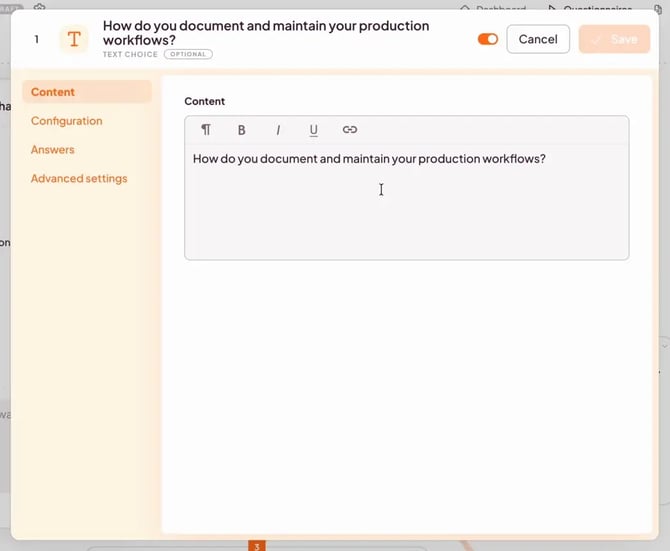 Editing the question text.
Under Configuration, turn Optional question on or off, count a custom score for the question, and set a score weight.
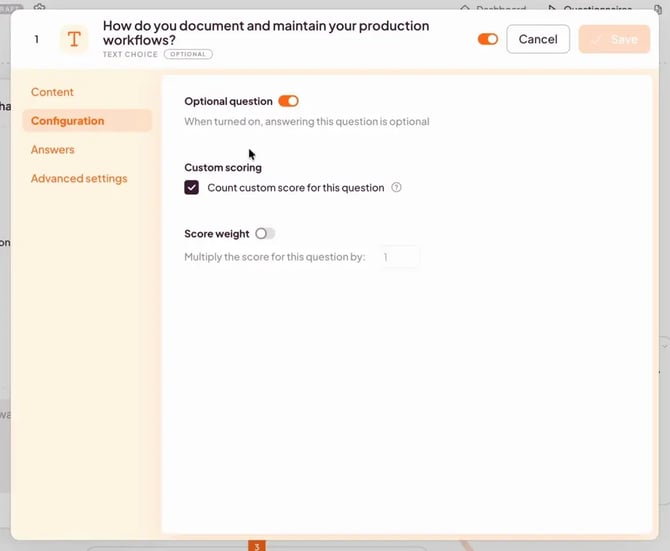 Optional question, custom scoring, and score weight.
Under Answers, edit the answers and the score each one gets when a respondent selects it. Click Add answer to add more.
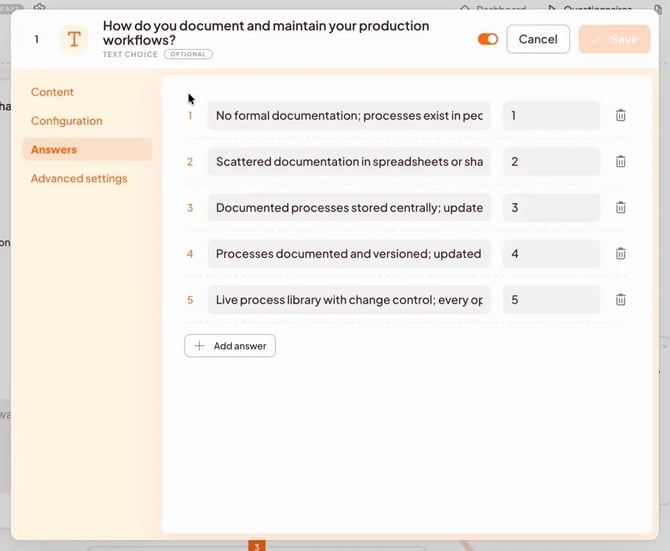 Answers, with the score for each answer.
Under Advanced settings, add a Not applicable answer, randomize the answer order, show answers in 2 columns, allow multiple answers, or allow comments.
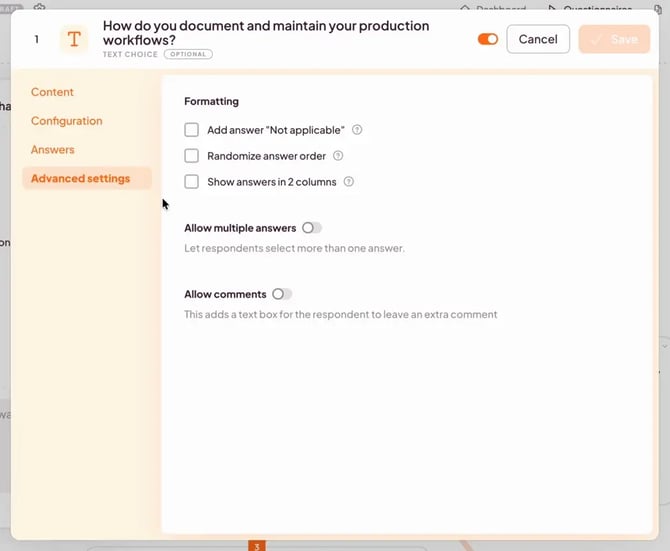 Advanced settings for a question.
6. Review your skip logic
Skip logic is shown graphically on the canvas. Hover over a line to see where an answer leads. In this example, if a respondent answers question 1 with no formal documentation, question 2 is skipped and they go straight to question 3. To change the logic, connect the outcome of an answer to another question.
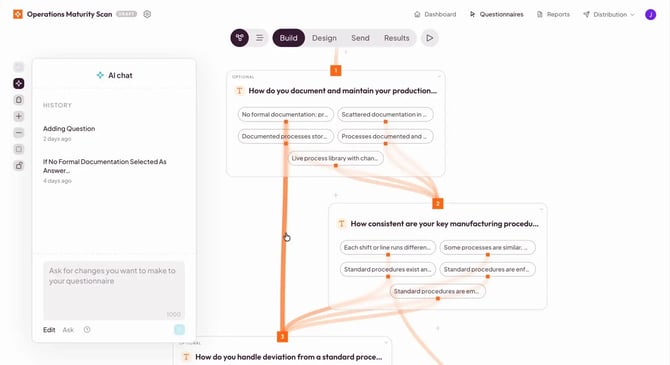 Hovering over a line highlights where an answer leads.
7. Edit your assessment using the AI chat
Besides the edit screens and the list view, you can change your assessment by chatting with the AI chat. Your earlier chats are stored under History, so you can always look back at what you did before.
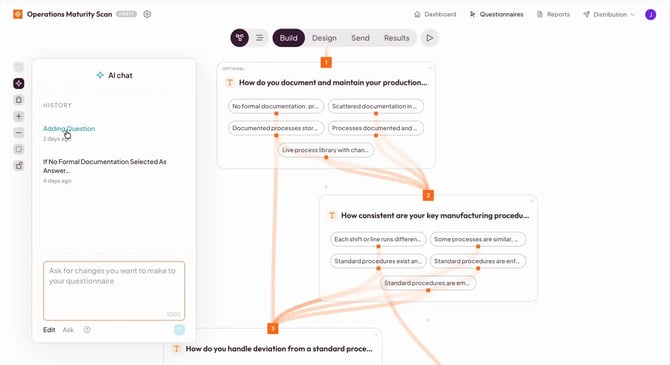 The history of earlier AI chat requests.
Describe the change you want in the text box. For example, ask the AI chat to delete question 2.
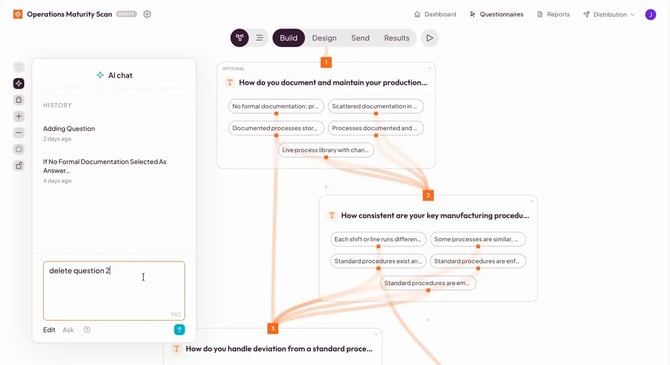 Asking the AI chat to delete question 2.
When you send a request like this, the lines from question 1 connect directly to question 3, and the skip logic for the deleted question is removed.
8. Edit the final screen
Scroll to the bottom of the canvas to find the final screen. It shows the message respondents see, a button to view their results, and the multiple outcomes of your assessment. In this example there are five outcomes based on score, from 0–24 and 25–49 upwards.
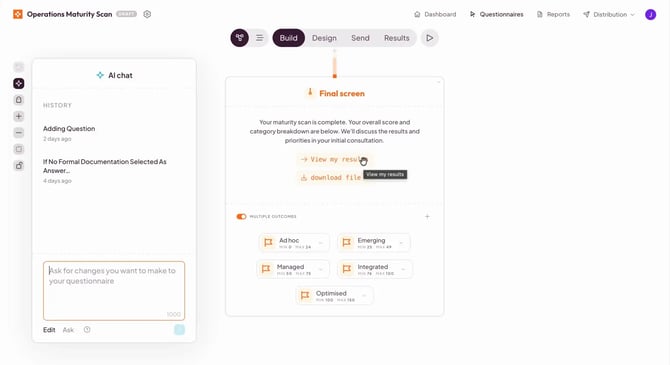 The final screen, with its score-based outcomes.
Open the edit screen to change the final message. Under Final button, choose where the button takes respondents: the start of the questionnaire, a custom URL, or the respondent dashboard. You can also set an auto-redirect after 10 seconds. Under File download, let respondents download a file.
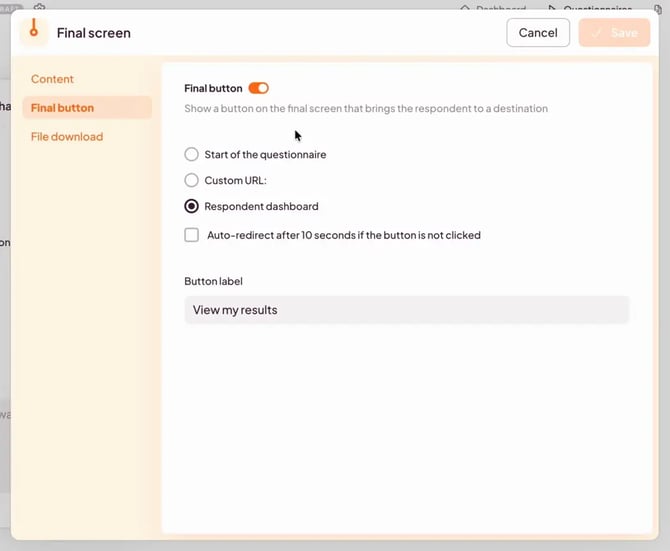 Choosing where the final button takes respondents.
TIP
Use the final screen to tell respondents that their results are on the way and where they can find them, for example on their respondent dashboard.
9. Test your scoring with the ghost respondent
The ghost respondent shows what your respondents' answers mean for their score. Open the ghost respondent panel and click Enable.
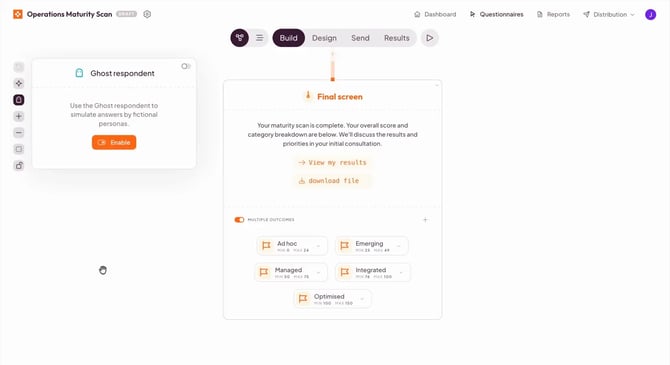 Enabling the ghost respondent.
Select a persona to see what happens if someone gives the lowest answers, the highest answers, or something in between.
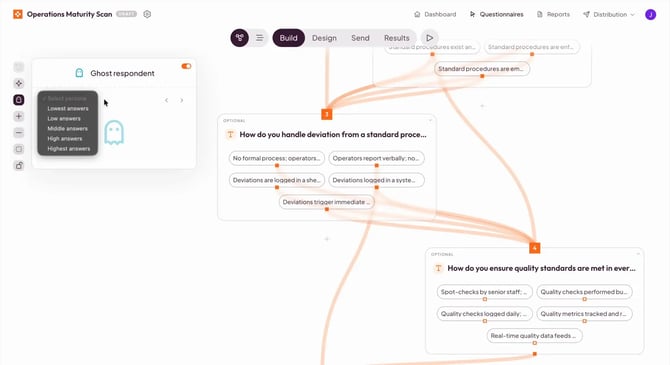 Choosing a persona.
The ghost respondent then highlights the answers that persona would select and the path they follow through your assessment.
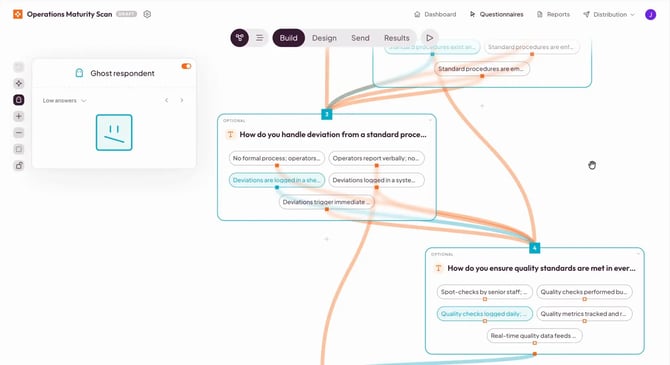 The answers and path of the selected persona, highlighted.
TIP
Use this to check whether you need to adjust your questions or answers before respondents take your assessment.
10. Lock and publish your assessment
A new assessment is in draft mode. To publish it, first lock the canvas with the lock icon in the toolbar on the left, so it can no longer be changed. Then click the cog wheel next to the name of your assessment.
In the settings, turn on Live status. Your assessment now has a URL that is ready to send to respondents. Click Save to confirm.
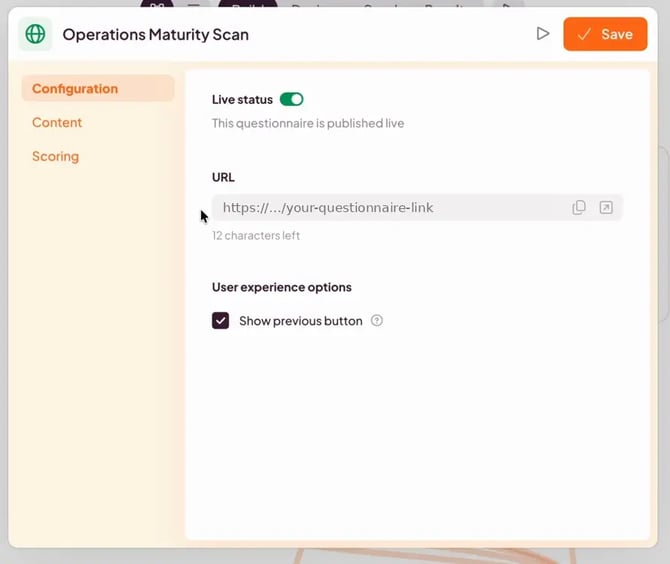 Turning on the live status of your assessment.
Once saved, the name of your assessment turns green and shows LIVE.
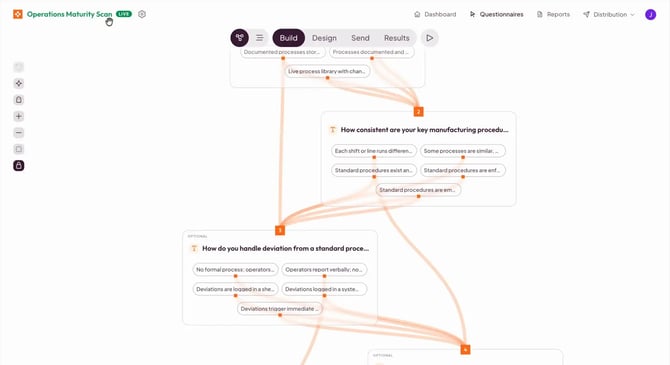 A live assessment, with its name in green.
NOTE
You can't change an assessment while it's live, even if you unlock the canvas. To make changes, take the assessment out of live status first.
What's next?
- The assessment overview screen
- How to design your assessment's look and feel (coming soon)
- How to send your assessment to respondents (coming soon)
- How to read and share your results (coming soon)
Don't want to build it yourself? We offer professional services. Our team can help you design and set up your assessment from scratch. Find out more and get in touch.