You'll need this:
-
One of these Pointerpro plans:
![]() Professional
Professional ![]() Enterprise
Enterprise ![]() ReportR
ReportR ![]() DistributR
DistributR
Text widget is an absolutely essential building block of your PDF report! The example below shows how it can be used as a title, and an explanation.

Are you wondering how to get started with building your own assessments with personalized feedback? Try our onboarding cookbook: a tool that provides you with a personalized cookbook of all the information and Pointerpro features to build what you need. Start the assessment
On this help guide page:
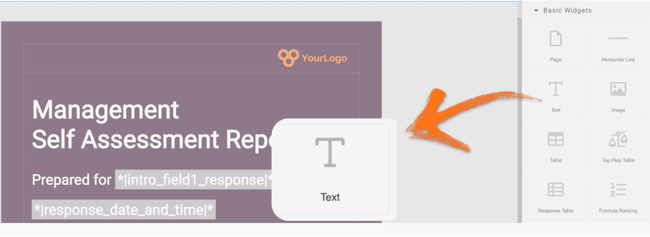
1. Add a text widget to the page
To add the widget to the page, all you have to do is click on it and drag and drop it on the page.
If you would like to create columns and split your content, then first you would need to select the number of columns you want. You can find all the different column formats at the Layout Widgets.
Here is an example of a banner. This is a 4-8 columns option: on the left there is a text widget and on the right is an image widget.

2. Add your content
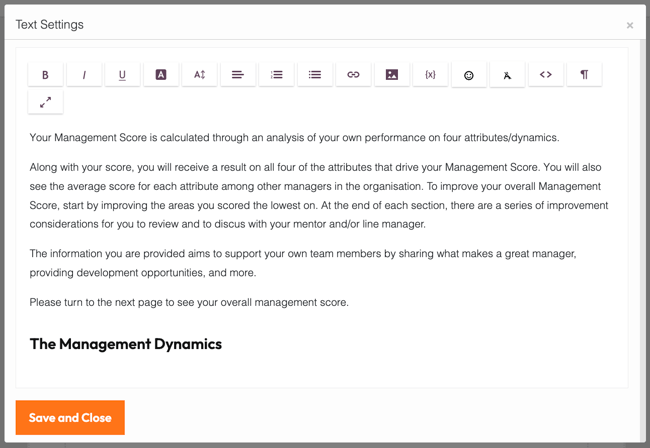
Once you add the widget a pop-up window will open where you can add your content.
With our text editor you can make your content look appealing and professional, add links or images. Your final PDF display will be determined by the layout and the style you will use for your content here, so take care to space it out properly and make sure the font is the right size.
Add a title in a text widget before each one of your charts so that respondents will know what is being displayed. For example, you can describe exactly what the table or spider chart is displaying.
To make advanced design changes to your content, you can add your own custom CSS.
Once you are finished just click the Save and Close button.
3. Additional settings
Select the widget and then at the right of the screen click on the Settings button. The widget list will be replaced by the additional settings.
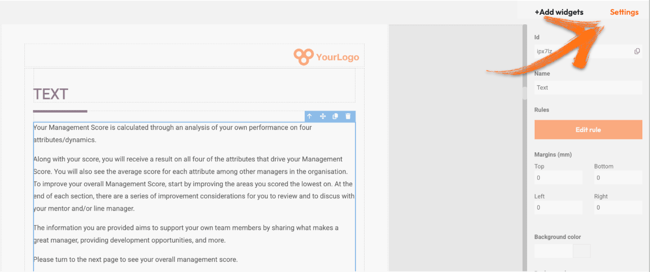
Here you can find the following settings:
1. ID
This is the ID of the widget.
2. Name
You can name your widget in order to identify it easier.
3. Rules
You can add your widget logic rules to ensure that your content will be visible only when the conditions are true.
4. Margins
Add margins to create space around elements and move them in your page. By default the margins are set to 0, but you can change that anytime and add the margin you prefer.
5. Background color
You can change the background color of this specific widget by clicking the color selector.
6. Background image
Click Upload image to add a background image only to this widget.
7. Borders
You can add borders, select the color, the style and the line width.
4. Additional buttons
When you click on your widget four blue buttons appear to the right.
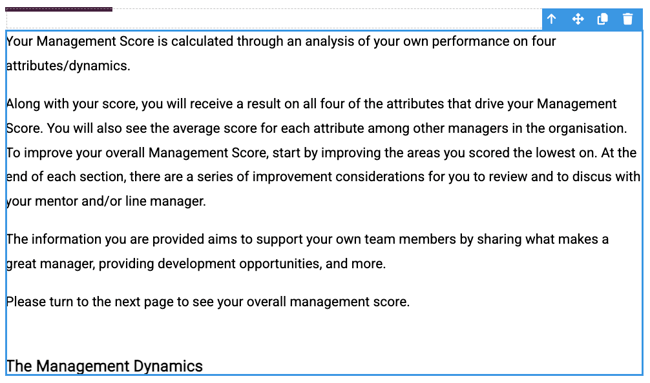
The Arrow allows you to move between the different layers of the page. For example if you add a widget in a column then you have 3 layers: the page, the column and the widget. The arrow allows you to quickly select a different layer.
The second icon, the four arrow sign, allows you to move your widget up or down to the page.
The third icon, the page, allows you to copy this widget and the forth icon, the bin, to delete it.
What's next?
- Report Builder - PDF step-by-step example: Check out our step by step guide to create an attractive and stylish PDF. It includes videos but also very detailed instructions.
- Basic Widgets: Table: The Table widget allows you to display results clearly and concisely to your respondents. It is an easy and fast way of displaying any data in rows and columns. Rather than writing your data in text, you can make it more understandable and easy to read with this widget.
- Basic Widgets: Image widget: This widget allows you to add pictures to your personalized report, to make it more interesting. It can be a great way to keep respondents engaged and break up long blocks of texts or lots of tables. Adding pictures, in some cases, can provide more detail than words and it can be a great way to display information!
Don't want to build it yourself? Contact our professional services team
